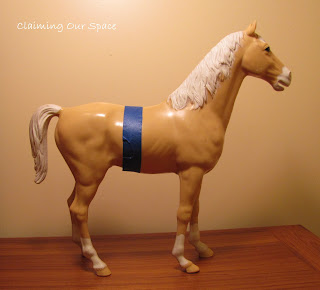
I was horse-mad as a kid and had horses all over my room. Over the years, they were given away, broken, or donated but a few managed to get boxed up. I had previously turned one into an art piece and when I found this beautiful palomino in another box, I knew I had to transform him as well.
This project is a bit time consuming, mainly because of the wait time for the caulk and paint drying, but I really like how it turned out.
You will need
- a large plastic horse
- tape
- hack saw
- sanding block
- 2 small pieces of wood
- gorilla glue
- kreg jig
- wood glue
- 4 larger pieces of wood
- screws
- caulk
- spray primer
- spray paint
1. Start with your large plastic horse. Mark with tape where you will want to make your cut.
2. Make your cut. If the edges are a bit rough, sand them with the sanding block. Give each side a quick spray with the primer.
3. My horse was hollow so I needed to add an additional support to screw into the wooden part of the bookcase. I cut 2 small pieces to fit inside, rounding the edges. I used the gorilla glue to secure it inside the horse.
4. I used my Kreg jig drill the holes to secure the pieces of wood for each bookend. I used the wood glue for a little extra insurance. If you don't have a Kreg jig, just make sure to pre-drill your holes so the wood doesn't split.
6. Using caulk, fill in any gaps.
7. Give everything a spray and you are all set. I used Krylon Ivy Leaf. It is the same green that is in the fabric for the chair I am reupholstering.


Amazing! I always loved horses as a child, and grew up on a horse farm. I love this set of DIY bookends. Thanks for sharing the project. ;o)
ReplyDeleteThanks and while it looks complicated, it wasn't that hard - just time consuming. Hope you make a set of your own.
DeleteYou're so creative! I love this idea, can you imagine the gift possibilities?!
ReplyDeleteThese would make a great gift! Thanks for stopping by.
DeleteLove this project, so creative! Great idea!
ReplyDeleteThanks for stopping by! Glad you liked it.
DeleteOH that is just brilliant! I love this idea and you could adapt it to so many different toys etc!! Thanks for sharing!
ReplyDeleteThanks for linking to a Round Tuit!
Hope you have a fabulous week!
Jill @ Creating my way to Success
http://www.jembellish.blogspot.com/
Thanks for hosting another great party.
DeleteThat is so cool! Thanks for linking up at The Gathering Spot this week. Have a wonderful week. http://mamaldiane.com/
ReplyDeleteThanks for hosting another great party.
DeleteVery smart! Was it hard for you to cut it into two? Not physically, I mean mentally/emotionally? We get so attached to childhoods things sometimes. Thanks so much for sharing at Etcetorize this week!
ReplyDeleteYou know, since "Goldie" had been lost in a box in my parents' basement for so many years, it wasn't that hard. Then again, I did come up with a project so I wouldn't have to donate him, so I guess I wasn't totally ready to give up my horsey childhood. :-)
DeleteBeautiful art work done by using wood glue!!
ReplyDeletewhere can i find lg plastic horses?
ReplyDeletewowwww amazing found! ;)
ReplyDelete