Last year for my birthday my mom got me one of the best presents EVER! A set of stainless cookware! Woohoo! It was this set from Wolfgang Puck. It is so fabulous! [please look away as I hug the wok that came with this set]

This stuff can be washed in the dishwasher, it cleans up quickly and easily, it can be washed in the dishwasher. I had to put that one in there twice since our other set of pots and pans from Analon can't be. Sometimes that is a bit of a (or rather a giant) pain to hand-wash them, especially when we make a recipe using lots of pots and pans. With this set, after making a really messy dinner where I have baked on stuff, a quick soak, a bit of a scrub and, BAM, clean saute pan!
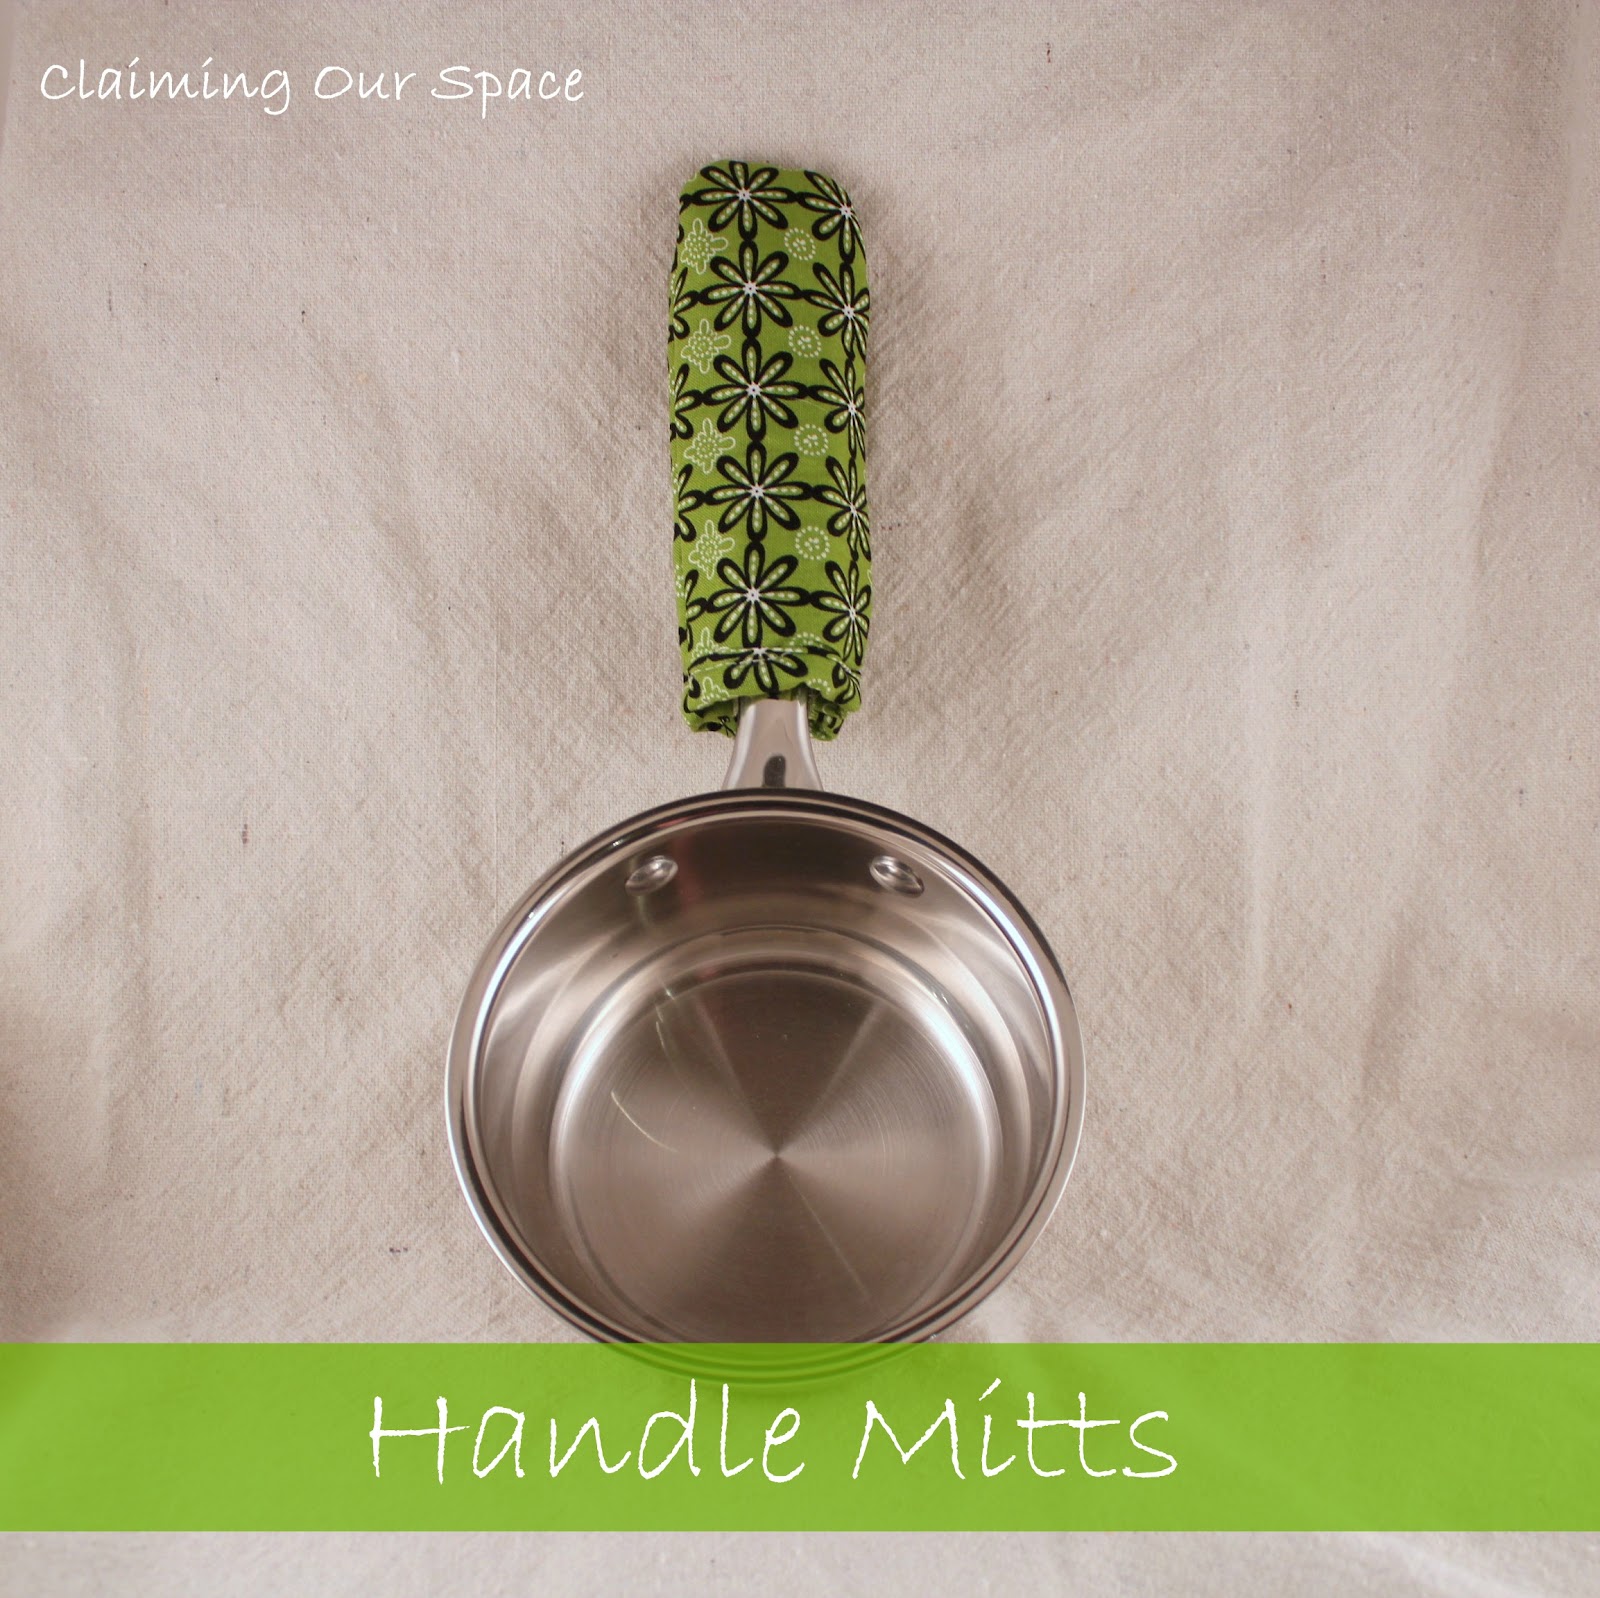
Another good part is that you can saute on the cooktop and then put it directly in the oven. How great is that? This greatness leads to the one drawback of this type of cookware - the stainless handles get stinking hot. So the move from the over to the cork trivet can be dangerous if you aren't careful.
My fear of burnt fingers made me whip up a few handle mitts inspired by the kind they use at Chili's for the Skillet Queso. Yes, we could use oven mitts or pot holders, but what fun is that? I wouldn't get to use my sewing machine or one of the fabrics in my stash. (OK, maybe these things aren't actually called handle mitts but I though pot mitts or oven holders just sounded odder than handle mitts. Yeah, I make up words all the time)
These are a quick and easy project. Once I figured out the dimensions and cut out my template, I was able to whip up 3 of them in less than an hour. Yup, it was that quick.
DIY Handle Mitt
1. Make a template out of card stock
For my handles my template was 6 inches long by 3 inches wide.
I used a candletick to get the curve on the end

2. Use your template to trace and cut out
2 pieces of "pretty" fabric
2 pieces of insulbrite batting
2 piece of liner fabric (I used scraps of drop cloth)
This is for 1 Handle Mitt

3. Cut either a piece of bias tape just larger than the shortest dimension of your fabric or if you are like me, and don't have any bias tape, You can just take a a piece of your fabric and make your own.
Cut a piece of fabric 4 inches long and 2 inches wide.
Fold in half and finger press.
Fold each side into the middle, finger press
Fold in half.
4. Layer the pretty fabric, batting and liner together with the bias tape - pinning them together.
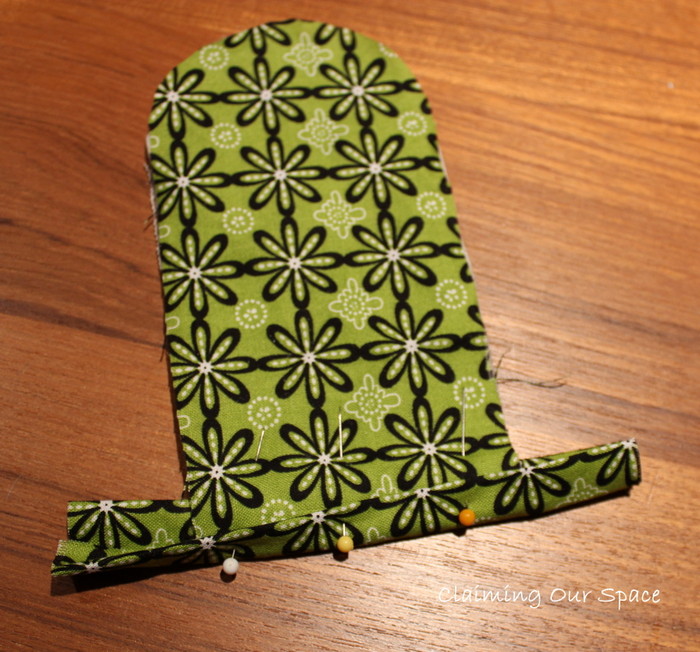
5. Sew on bias tape/fabric and trim off excess

6. Place right sides together and straight stitch around the edge, leaving enough room to do a zip zag stich between the straight stitch and the edge of the fabric.


7. Using an unsharpened pencil or chop stick, turn the handle mitt right side out and you are all done!


This is so brilliant! I burn myself all the time on the handles of some of our cookware and this is such a great solution! I'd be thrilled if you would link this up to my current link party: http://practicallyfunctional.net/2012/07/the-fun-in-functional-link-party-8/
ReplyDeleteThanks for the invite. I am heading over now.
ReplyDeleteThanks so much for linking up! I really love this idea :-)
DeleteJust wanted to let you know I featured this awesome idea and tutorial on my blog today! Feel free to check it out and grab a Featured button :-) http://practicallyfunctional.net/2012/07/features-from-the-fun-in-functional-8/
DeleteI definitely NEED to do this!!
ReplyDeleteThanks for stopping by. I would love to know if you make your own!
DeleteThis is GENIUS!! Really it is!!!! Loving the handle mitts!
ReplyDeleteThanks so much for sharing this at The DIY Dreamer... From Dream To Reality!
I need this for my cast iron pans. They turned out really cute!
ReplyDeleteI would love it if you would share this at the Smart Solutions linky party. You can link up here:
http://theprudentpantryblog.blogspot.com/2012/07/prudent-projects-and-smart-solutions.html
Have a great day!
Oh these are so (sew!) cute! If I didn't have rubber coated pot handles, I would totally want to make myself these! Oh wait, I could us it on my iron cast pan! Now only to get insulbrite batting... Thanks for sharing!
ReplyDeleteCONGRATS!!! You have been Featured at The DIY Dreamer.. From Dream To Reality!! Come on over and grab the featured button :) You deserve it!
ReplyDeletehttp://thediydreamer.blogspot.ca/2012/07/from-dream-to-reality-linky-party-27.html