
I have been seeing chalk paint makeovers everywhere in the blogosphere. Of course there is Annie Sloan, the original, fabulous to be sure but expensive! And limited in color. So the crafty and ingenious women and men of the internet have come up with tons of recipes for DIY chalk paint - some use unsanded grout, some use plaster of paris, some even use baking soda.
For my table makeover, I went with a plaster of paris recipe from Elizabeth & Co. 1 part plaster of paris, mixed with just enough water to make it smooth and 3 parts paint. That's it. Easy peasy! Now according to the info I found online, apparently flat paint is best however, I was planning on using oops paint to get just the right shade of light greenish grey and some of that paint was, well, unknown.
Here I am with all my supplies. I am a messy painter so I usually try to paint outside.

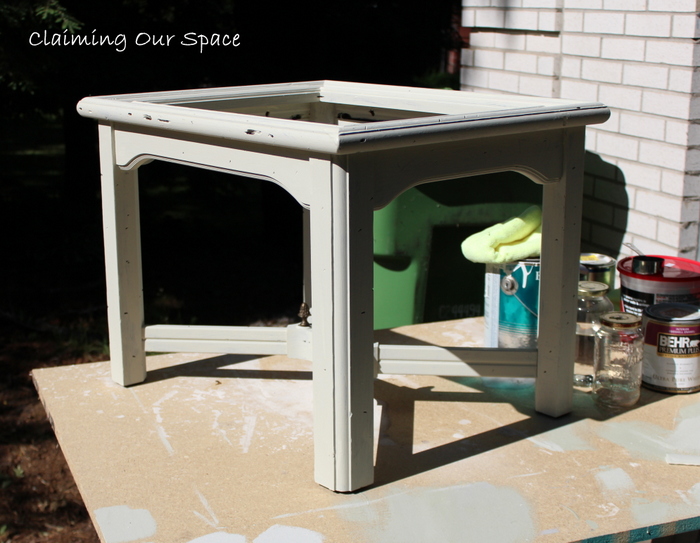
I started with this "lovely" table that I got off Craiglist for free. I had bought a desk and the seller decided to throw in a couch table and end table for free. Not a bad deal since I got all three pieces for $15.
While it has these cool finials on the bottom, it also has this so attractive plastic brass. I tried to pry it out and that just didn't work. I was afraid I would damage the wood if I tried to remove it. That "brass" was part of the reason why I wanted to try the chalk paint. It apparently sticks to everything, even without priming.

You can see from the photo below, it took me a while to get the color just right. Yes, you are counting right, there are 7 different color tries at getting the color just the way I wanted it. I used white, dark grey, light grey and green paint. Thank goodness I made enough to do the 2 coats because I wouldn't be able to recreate it again.

Once I got the color right, things progressed very quickly.
The first coat went on with great coverage. It was a bit rough but the second coat seemed to even it out.
One of the best parts about this paint is that it dries amazingly fast. I got 2 coats on and dried in less than 3 hours. It would have been less but I was working on other stuff at the same time. (I love multi-tasking!)
Once the paint was dry, I gave it a light sand with a sanding block. This really smoothed it out.
Here it one spot before sanding. You can see that it is a bit grainy.

Here it is after a light sand. The graininess is gone and it is so smooth.

A couple of coats of Minwax Paste Finishing Wax and the table was ready to go back inside.
It is also the perfect spot to put my foreign coin art while I gather the rest of the pieces for my gallery wall.
One other part of the table makeover - I painted the back of the glass top with liquid gilding paint in platinum, like this.

It adds a subtle shine to the table that I just love.
I think it looks fabulous in its new home!

The paint color is a lighter version of the grey green in the wall hanging right behind it.
Check out the places I party.


That looks so cool! Thanks for the tips. Found you from Sumo's Stuff. Love for you to stop by Naptime Review and follow back ;) Hosting Mom's Monday Mingle. You are welcome to link up. Over 50 moms so far!
ReplyDeletewww.thenaptimereview.com
Thanks for stopping by and for the invite. Does being a dog mom count as being a mom?
DeleteThat looks amazing! I found you on the Serendipity and Spice link party. I have noticed there are so many recipes for making your own chalk paint. I definitely want to try this and use it on an end table I have that needs some TLC.
ReplyDeleteJess @ The Delightful Crafter
Thanks for stopping by! This recipe is so easy and works great. I am planning on using it on several other pieces. I am your newest follower so looking forward to seeing how your end tables turn out.
DeleteGreat makeover on that table! And I love the painted glass part too!
ReplyDeleteThanks for linking to a Round Tuit!
Hope you have a fabulous week!
Jill @ Creating my way to Success
http://www.jembellish.blogspot.com/
Thanks for hosting another great party!
DeleteI just recently tried chalk paint for the first time too! I think I need more practice but you end table looks great!! you are a pro!
ReplyDelete-Peggy
Thanks for stopping by! Not sure what your problem was but I know I had to constantly add water to keep it thin enough. Good luck on your next attempt.
DeleteYour table looks great! I just starting dabbling in the chalk paint world as well. I recently redid an Ikea Coffee Table!
ReplyDeleteI'm now following you via GFC. I'd love for you to check out my blog and link this project to my link party, Cooking and Crafts. http://www.jamscorner.com/2012/07/document.html
Have a fabulous evening! :)
Julie
www.jamscorner.com
Thanks for stopping by and for the invite. I have linked up and added your button to my Places I Party list.
DeleteIt looks so pretty! Thanks so much for sharing at Mix it up Monday :)
ReplyDeleteThanks for hosting a great party.
DeleteYou picked the perfect time to link this up to my party!! I just picked up a nightstand at the thrift today for $7.50 and I want to try the chalk paint on it for our master bedroom! I am so psyched to get started now after seeing your recipe and results! Seriously, a huge thank you again for sharing this!
ReplyDeleteYay! So glad to help. I can't wait to see how yours turns out! I can say the light sanding seemed to make all the difference in the world. Before I did that, I wasn't sure what all the fuss was about. Thanks for hosting another great party!
DeleteIt turned out great. Small changes can have a big impact.
ReplyDeleteThanks for stopping by! I am so happy at how the table turned out.
DeleteThanks for linking this up to my party! I hope to see you again at next week's party. :)
ReplyDeleteJulie
Beautiful! I love how you did the top. Thanks for sharing at Terrific Tuesdays.
ReplyDeleteRachel
adventuresofadiymom.blogspot.com
It looks fantastic! Great re-do!
ReplyDeleteThe table looks... GREAT!!!!!
ReplyDeleteThanks for sharing this at The DIY Dreamer.. From Dream To Reality! I can't wait to see what you link up this evening! :)
Hi everyone, it's my first pay a quick visit at this site, and piece of writing is really fruitful for me, keep up posting these types of articles.
ReplyDeletemy weblog - whole bean coffee
Amazing! Its actually awesome paragraph, I have got much clear idea about from this paragraph.
ReplyDeleteAlso visit my site: Kayjewelersengagementrings.Net
Does your site have a contact page? I'm having a tough time locating it but, I'd like to send
ReplyDeleteyou an email. I've got some suggestions for your blog you might be interested in hearing. Either way, great site and I look forward to seeing it develop over time.
my blog :: just click the next webpage
Do you have a spam issue on this website; I also am a blogger, and I was wondering your situation; we have developed some nice procedures and we are looking to exchange strategies with other folks, be sure to shoot me an e-mail if interested.
ReplyDeleteFeel free to visit my web-site ... Indian Women
Hi there, I log on to your blog daily. Your humoristic style is witty, keep
ReplyDeletedoing what you're doing!
Review my web page ... baby clothing distributor
Thank you for sharing your info. I really appreciate your efforts and I will be waiting
ReplyDeletefor your next post thank you once again.
Also visit my homepage; teich pumpen