
After last weekend's Trouble with Trivets , I still had many corks left in my "Big Box o' Corks." I also had more space in my drawer where I keep my oven mitts, pot holders and trivets. Did you know that Corks + Space = More Trivets? I personally think this equation may be one of Pythagoras lost theorems.

This time construction went much quicker since there was no cork cutting since I wanted a trivet with more surface area. Why? While the trivet I made last week is fab looking and I love how it turned out, the reality is that it can't hold larger pots or pans. Square pans are a bit wobbly on it due to its rounded shape and what if I made a batch of brownies or a pan of enchiladas? I wasn't sure this small(ish) trivet would be able to handle them.
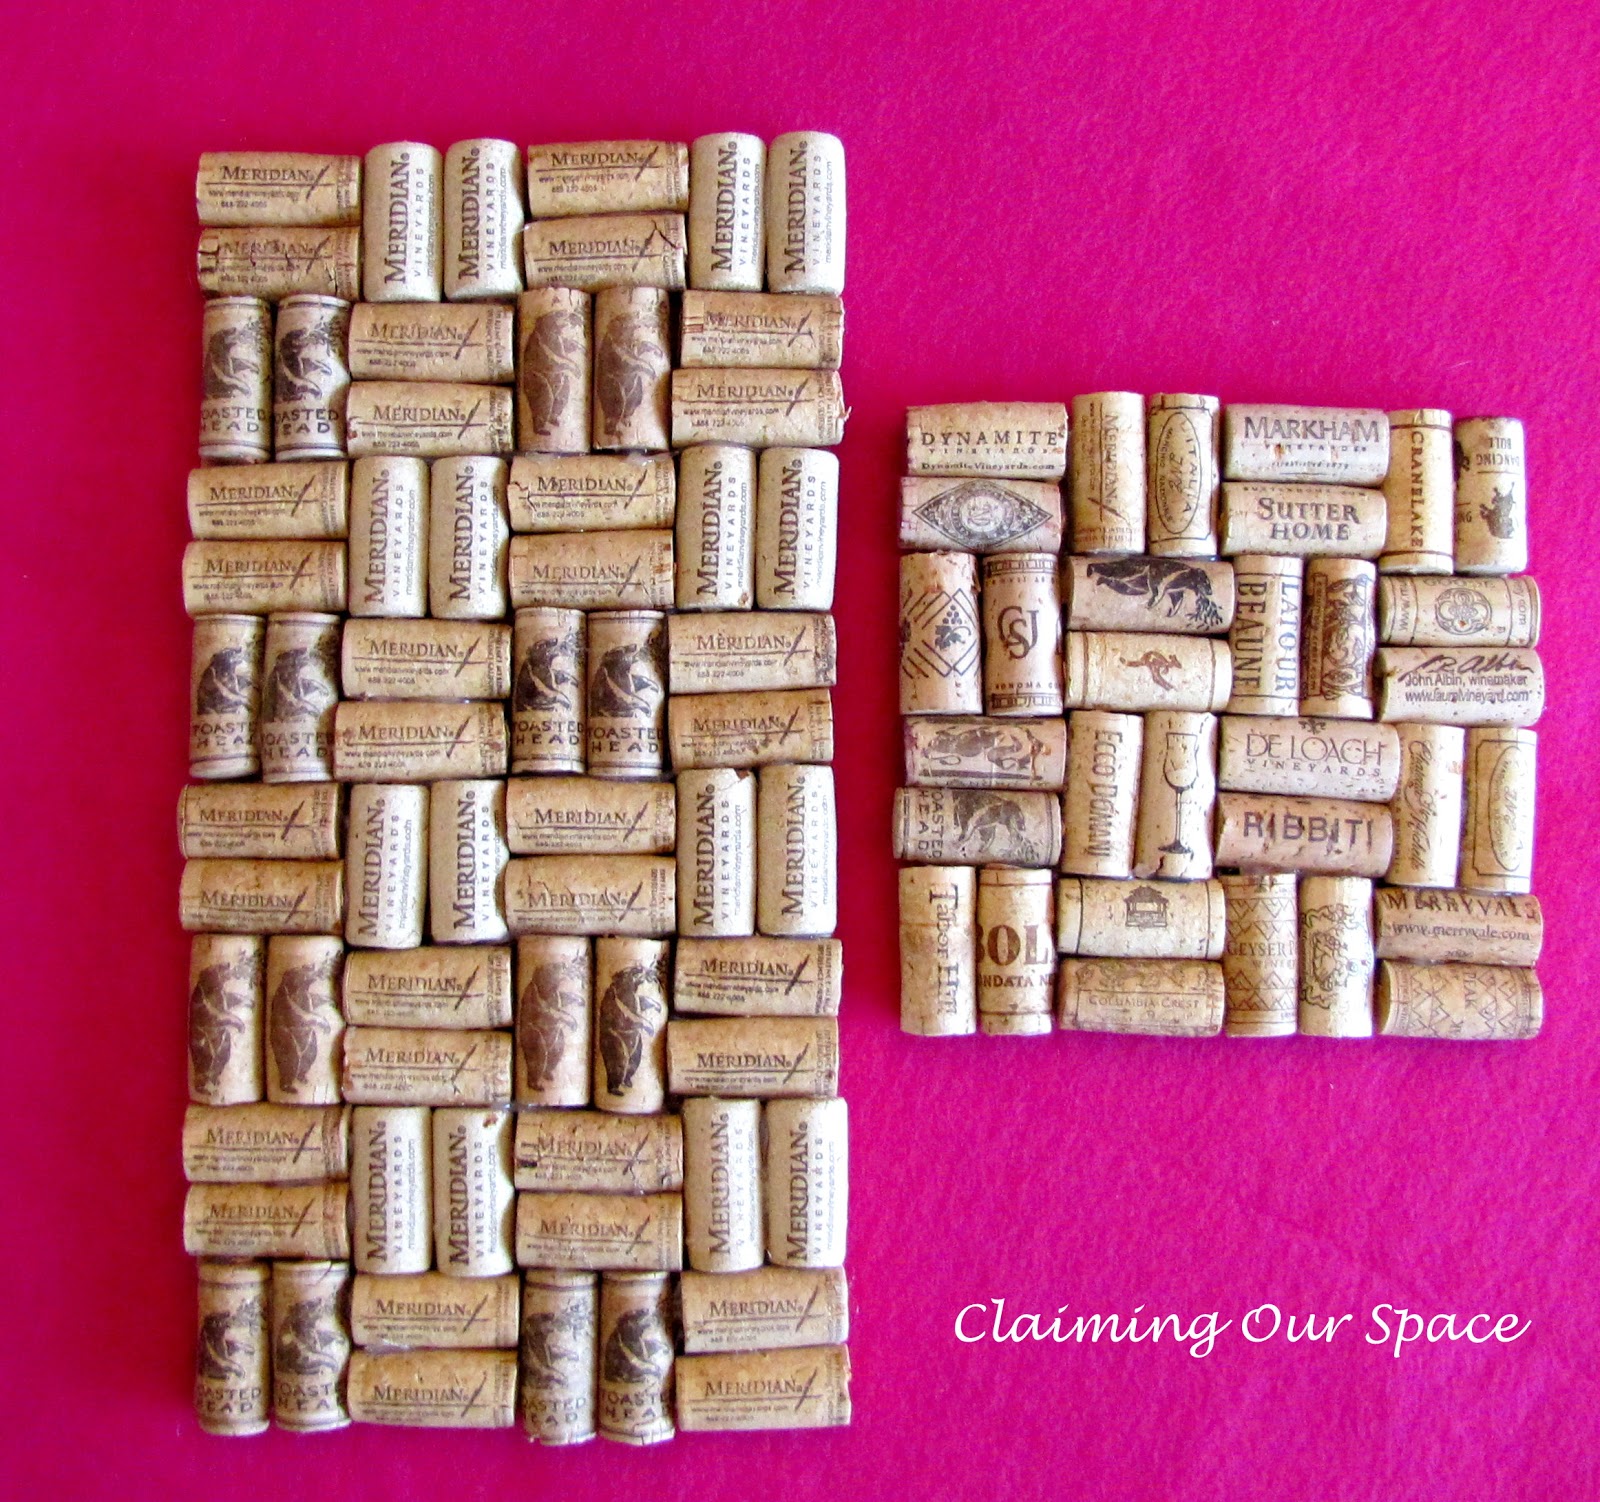
So my plan was to lay the corks on their sides in a basket weave pattern and hot glue them to the felt backer and to each other. I love it when a plan comes together.
The first trivet is 4 sets of corks wide by 4 sets of corks tall (approximately 7" x 7"). You will need 32 corks for this layout. This size is perfect for those 8x8/9x9 pans.
The second is 4 sets by 8 sets (approximately 7" x 14"). You will need 64 corks for this layout. This size is great for the 9x11/10x13 pans.

I realize that being able to make some trivets utilizing over 100 corks, and still having a bunch left over, makes it appear as if Hubs and I are hanging out in the evenings and on the weekends drinking our selves silly so I can get my craft on.

That isn't the the case. I have asked several of my family members to save me their corks, including my little brother who works with a caterer. Parties = lots of corks.
 | Step 1: Gather materials Corks* Hot Glue Gun Ruler Marker Scissors |
 | Step 2: Laying out your pattern Since the sides of the corks are visible, choose ones that have interesting patterns or fonts on the sides. Also, if you have any corks from red wines, you can place those so the red end is visible. I chose a basket weave pattern since I like the look. I made sure to have any writing or images all lined up in the same direction. Make sure to lay out your pattern off to the side of where you will be gluing. This will ensure that you don't have to keep moving them around your workspace. |
  | Step 3: Marking and cutting the Felt I laid one row up and one row across on my piece of felt to get the dimensions, marking the edge with a marker. I them trimmed it to size. |
  | Step 4: Gluing the corks, part 1 Starting in one corner, hot glue the corks to the felt in your selected pattern. I tried both putting the glue on the felt and on the cork. I decided that putting a zig-zag bead of glue on the cork itself and them applying it to the felt worked best. I glued one row across then one row up first. Then worked my way from one side to the other. Once our have all your corks on, let cool completely. |
 | Step 5: Gluing the corks, part 2 You will need to glue in between the rows to give some added stability to the trivet. I folded the trivet and put a bead of glue along the bottom of the corks on one side. Glue all the gaps in one direction. If it is still a bit wobbly, glue the gaps in the other direction. Let cool completely. |
All done! Now all you need to do is make something so you can use them!
While I still have a bunch more corks in my Big Box O' Corks, it is going back in the basement since I am done with them for a while.
Cost: $0.00
This was another no cost project since I had all the materials in my craft stash.
*Last week one of my commenters asked where they could get a bunch of corks if they weren't big drinkers. If you can, ask your friends and family (like I do). If that isn't an option, check out eBay, Etsy, your local Craigslist or even ask on your local Freecycle. You could also try to ask at a local bar/pub/restaurant that serves wine, seeing if you can you have/purchase any corks they may currently throw away.
Linking back to:
Making the Word Cuter, A Round Tuit, The Girl Creative, Mad in Crafts, Keeping it Simple, Sumo's Sweet Stuff, Singing Three Little Birds, Skip to My Lou, C.R.A.F.T., Craftomaniac, Marvelously Messy, Coastal Charm, Northern Cottage, Hope Studios, Sugar Bee Crafts, Homework,Today's Creative Blog, Confessions of a Stay at Home Mommy, The Thrifty Home, Blue Cricket Design, Passionately Artistic, Not Just a Housewife, Crafty, Scrappy, Happy, Brassy Apple, Homemaker on a Dime, Sisters of the Wild West, Tutus and Tea Parties, Dwell on Joy,


This is a great recycle project. I love corks, but I too don't drink- it really cramps my crafting style. Thanks for the inspiration!
ReplyDeleteWe aren't big drinkers either, though you wouldn't know it from my last 2 posts, which is why I ask family and friends to save theirs for me. Thanks for stopping by.
DeleteI LOVE decorating with wine corks! These are awesome! I'm hosting a linky party, the theme is all time favorite post- would love it if you joined in!
ReplyDelete-Melissa
www.SerendipityandSpice.blogspot.com
Thanks for stopping by and will do on the linky party.
DeleteAnother great cork project!!
ReplyDeleteThanks for linking to a Round Tuit!
Hope you have a fabulous week!
Jill @ Creating my way to Success
http://www.jembellish.blogspot.com/
This is Awesome, found you on Sumo's Sweet Stuff.
ReplyDeleteThis is sooo great! I would say I have quite a few corks stocked up waiting for a good craft...and we didn't ask anyone to save any for us. :) Thanks so much for stopping by today, hopefully you got all signed up for the giveaway - $50 Lowe's gift card.
ReplyDeleteI'm your newest follower!
Thanks for coming over to Dwell on Joy to comment on Everyday Napkins! Love this idea as well - come on over and share at my new link party:http://www.dwellonjoy.com/2012/01/dwell-on-fridays-two.html
ReplyDeleteHappy rest of your week!
Thanks for stopping by. Will head over to your link party on Friday.
DeleteThis is a great idea. I've been working on some craft with the wine bottles, but not the corks yet. Have a few more to collect, but that shouldn't be too hard for me and my hubby.
ReplyDeleteWine bottles are next now that I got my bottle cutter. Thanks for stopping by.
DeleteLove it! I guess I need to drink a lot of wine!
ReplyDeleteI'd love for you to share: http://tutusandteaparties.blogspot.com/2012/01/pinteresting-party-week-24.html
Thanks for stopping by, am heading over now.
DeleteThanks for coming over to link this awesome project at Dwell on Fridays!
ReplyDelete