It's a guest post day here at Claiming Our Space. After checking out Rachel from Adventures of a DIY Mom's amazing furniture refinish (where does everyone find these furniture deals?), head on over to check out my plastic horse bookends.
I'm Rachel and I blog over at Adventures of a DIY Mom.
I'm Rachel and I blog over at Adventures of a DIY Mom.
I love to share craft and sewing projects. I love to bake and I often share recipes. I also host a weekly link party on Tuesdays.
Today I'm sharing a furniture refinish. I had been looking for something that could house all of our games. Right now we have board games in two bedroom closets and card games are in the kitchen. So when I came across this at a yard sale, I knew it would work perfectly. I snagged it for only $8.
 It was part of a huge three piece entertainment center. Luckily, they didn't make me buy the whole set. My husband thought it was just a boring box, so he added baseboard and crown molding to give it some character. So this is not a true before picture, but you can imagine what it looked like.
I took off the doors and gave it a quick sand. Then I painted the outside a light green I had left over from my basement. The color is Prairie Sage by Glidden. I left the interior white.
Then came the fun part - stenciling. I searched through the online Silhouette store and found this damask pattern.
 I cut it out with card stock, taped it on the door and painted. I used Frosted Pine by Glidden {another leftover from finishing our basement.}
Next I cut out some smaller stencils and painted them on the sides.

Both on the bottom and the top of the cabinet.
This was so much easier and quicker than my last stenciling project.

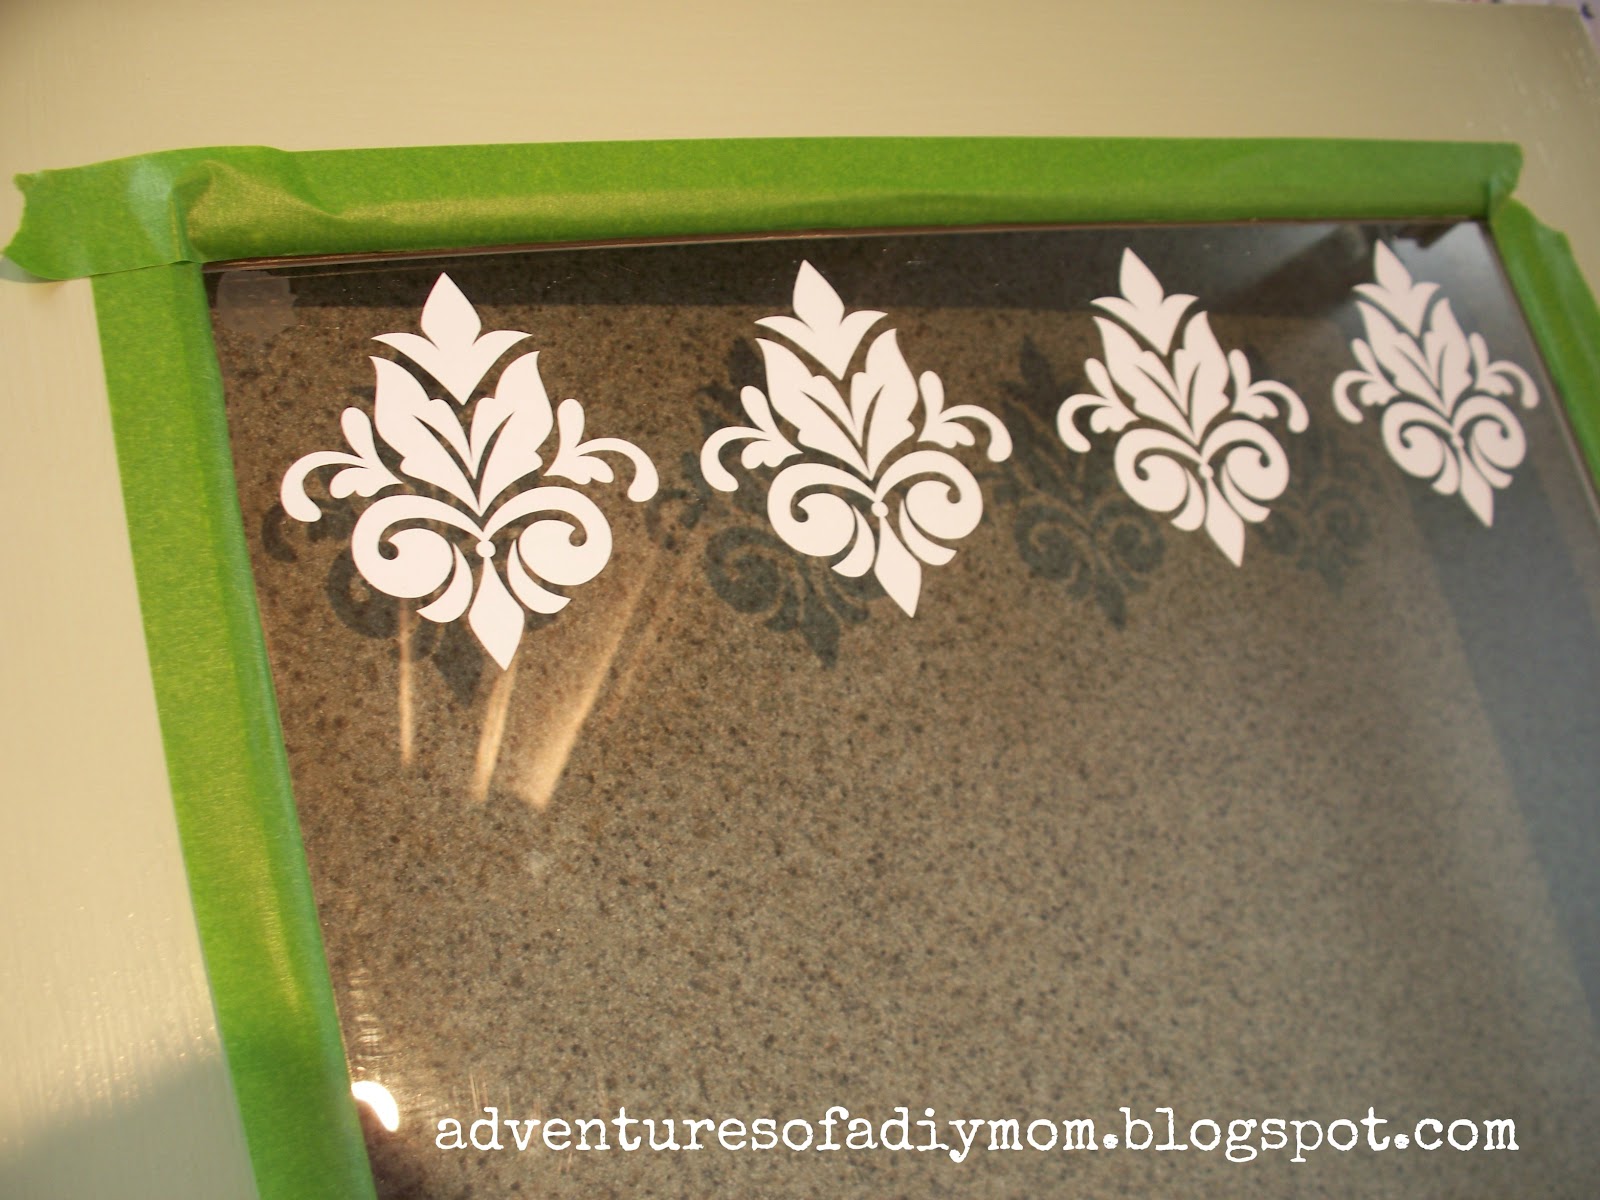
Once I was done painting, there was the problem of the glass door. I wanted to keep games inside, but that's not always very pretty. I decided to frost the glass. But I wanted to keep the damask theme, so I cut out some vinyl and put it in place.

I also taped the edges off and started applying the etching cream.

The bottle says it is not intended for large areas, and I wouldn't recommend it if you want it to turn out perfectly. There were a few spots that looked uneven, but overall I'm happy with the results.

I lightly sanded over the stenciled areas and also along the edges to let some of the white paint show through.
Today I'm sharing a furniture refinish. I had been looking for something that could house all of our games. Right now we have board games in two bedroom closets and card games are in the kitchen. So when I came across this at a yard sale, I knew it would work perfectly. I snagged it for only $8.

I took off the doors and gave it a quick sand. Then I painted the outside a light green I had left over from my basement. The color is Prairie Sage by Glidden. I left the interior white.
Then came the fun part - stenciling. I searched through the online Silhouette store and found this damask pattern.

Next I cut out some smaller stencils and painted them on the sides.

Both on the bottom and the top of the cabinet.
This was so much easier and quicker than my last stenciling project.

Once I was done painting, there was the problem of the glass door. I wanted to keep games inside, but that's not always very pretty. I decided to frost the glass. But I wanted to keep the damask theme, so I cut out some vinyl and put it in place.
I also taped the edges off and started applying the etching cream.

The bottle says it is not intended for large areas, and I wouldn't recommend it if you want it to turn out perfectly. There were a few spots that looked uneven, but overall I'm happy with the results.

I lightly sanded over the stenciled areas and also along the edges to let some of the white paint show through.
And here's the final result.

It fits perfectly in this spot at the bottom of the stairs. These pictures best capture the true color of the piece.

And a look at the before and after.

I love a good makeover that doesn't end up costing me a lot.
What do you all think of the result? Do you like the color and the stencil?
Thanks so much for having me!!


Love this. Very cute and looks well done!
ReplyDeleteWhat a wonderful piece!! The crown molding does add that little extra charm! I'm curious for your glass etching, how did you wash it off? I've never used the cream, but from what I see people run it under water. I liked to do a window in our apartment, possibly, but I don't know if I can really even take it down... So if you say you can just wash it off with a rag or something, then I might strongly think of doing it. Thanks!
ReplyDelete